No Sew Tie Up Shades

No Sew Tie Up Shades

One of the things I've been struggling with during the bathroom remodel is what to do with the windows. They are frosted privacy windows, but I noticed the other day that you can see outlines really well - which means when I'm taking a bath the neighbor could get an eye full! Yikes! Before the bathroom remodel began the hubs told me I could do anything I wanted, "it's your room, do what you want" to be exact. Woo hoo! Since I love France so much I decided to make this my little Parisian getaway. Not the overly formal Paris, but the more relaxed Paris that you see today. After more time on Pinterest than I want to admit I decided tie up shades or london shades were the best option. They give the feel I want without being too stuffy. I looked at tons of sites selling both tie up shades and london shades and could not find anything that I like.  So I decided to get creative.

Read More

Board and Batten, Board and Batten, Board and Batten... Everyone Is Crazy About Board and Batten!

Board and Batten, Board and Batten, Board and Batten... Everyone Is Crazy About Board and Batten!

Wow. The board and batten trend has taken over the DIY world! Everyday I'm floored by the number of people who have arrived at my new little blog looking for DIY board and batten projects (especially those of you who want to put board and batten along the stairs/stairway in your homes). I posted a few articles about my own DIY board and batten projects (you can check them out herehere,here and herebut I didn't do a step-by-step tutorial in any of them. I'm so new to the DIY blogging world that by the time I started working on my own DIY board and batten project there were literally thousands of tutorials floating around for the best way to do a DIY board and batten project yourself. So, to help all of you DIY gods and goddesses out there looking to DIY your way to beautiful board and batten in your dining room, entry way or anywhere else you feel moved, I have listed my favorite DIY board and batten projects from around the web.

Read More

Creating The Master Closet I've Always Wanted

Creating The Master Closet I've Always Wanted

A few days ago I hinted to the newest project around the Rozy Home - a custom master closet! Our current closet was a builder basic. A couple of shelves, a few ill placed rods and a whole lot of wasted space. Here are a few pics of the closet after I started cleaning it out for the master bathroom remodel:

Read More

$100 Bathroom Remodel

$100 Bathroom Remodel

Have you ever noticed that after your make one part of your house amazing you just have to make anything that touches that area just as beautiful? For the last couple of months I've been working on the entryway. I've added board and batten, painted the closet doors, restyled the entry table, repainted and (finally) bought roman shades for the front windows (see the big reveal here). I was so excited by how it all looked I even bought flowers for the containers in the front of the house (since I could see them through the lower windows) and a rug for the front door area. Everything looks so beautiful that I was starting to feel sorry for our lowly little powder bath. It's been so neglected throughout all of our remodeling. Yes, it got new floors but only because I had a bit left over from the master bath remodel. And it's true that it received new "utilities" when the flooring was redone. But other than that, it has barely been touched in the three years that we have lived here. It's been so faithful and always there for us but we treat it so poorly. So I decided to give it the love it deserved.

Read More

$1 Photo Wall Template

$1 Photo Wall Template

After putting up the board and batten in the entryway (you can check that out here or here), I knew I needed to rehang the photos along the stairs. I've seen those nifty little photo wall template kits that can help you design a layout and gives you the frames.  I love the idea, but I already have the frames and I'm too impatient to wait for a kit to be mailed to me. So I grabbed a cup of coffee (to get the creative juices flowing) and had an a ha! moment. I ran down to the laundry room, went through a few boxes of "scraps" from projects and came up with this:

Read More

Updated: The Arches Are Up!

Updated: The Arches Are Up!

  I'm excited to post that the arches in the entryway are up and finished!!!! Confession: I would not wish trimming arches on my worst enemy. It is a tedious process and one little cut and you are done.

I had the arches fabricated by a local trim guy so they would be done right. The first time I ordered them I entered the measurement in wrong (doh!) so I used those for the practice run. I measured, cut, measured, cut and measured and cut. After two days of driving myself crazy with levels and tape measures I finally got them up.

Read More

A Better First Impression

A Better First Impression

've always heard that you only have one chance to make a good first impression. When our realtor showed us our house three years ago my first impression was "wow... this needs work." And to be honest with you, I wanted to turn around and run. But I didn't. I headed up the stairs (which were covered in blue outdoor carpet) and into the living room. There was tile as far as the eye could see. I knew what a pain it was to pull tile so that was strike two for the house. But then something magical happened - our realtor (the beautiful Cara Keenan from Realty Austin) took us out onto the back deck. Instantly everything bad about the house disappeared. You see, growing up in Texas I had been surrounded by flat land my whole life. I had always loved trees, rolling hills, lakes. Yet living in the Dallas area, there was little of that to be found. But I wasn't in Dallas any longer - I was in the beautiful Texas Hill Country. And boy did this house make you well aware of that. We walked out on the deck to find this:

Read More

Board and Batten, Painting, Trim and Custom Closets... Oh My!

Board and Batten, Painting, Trim and Custom Closets... Oh My!

Guess what???? I have a bathtub!!!!

After the plumber installed it, he was so impressed he took a photo on his iPad!!  It was actually pretty funny listening to him install it. There were some choice words, lots of sighing and a bit of head scratching. But he did it. It's in, it's beautiful and by Saturday it will usable. Woo hoo! When my husband saw it his response was "now that's a bathtub." Of course he followed that with "I don't understand why you get so excited about a tub." My sister made a similar comment. Let's face it - I love bathing. I love soaking in a tub, so getting this massive beauty is pure joy. I know not everyone cares about tubs but I do - especially a freestanding tub. So beautiful. But enough about that.

Read More

My Beautiful Tea Tables

A couple of weeks ago I bought these beautiful tea tables from Nadeau:

I purchased them knowing I would be refinishing them (I didn't want white and I def. didn't want blue). I've been playing around with a few ideas. Because there is not a door between my bedroom and bathroom, the style of the bathroom really needs to overflow into the bedroom. Because I love black and white to a fault, the bedroom is going to end up in black and white as well (my husband keeps asking if we are ever going to have color in the house. The jury is still out on that). Keeping this in mind I took to the web. One of the first things I stumbled across was Krylon Looking Gl

Read More

The Other Project Is Getting There

I had a plan when I woke up this morning. I was going to finish the board and batten in the entry way. I brewed a cup of coffee and got to work around 8:30. I knocked out the back wall in about 15 minutes. I knocked the back wall out fairly quickly.

I had the foresight to have the panels precut for me at Lowe's. That saved a ton of time... kind of. Once I got to the stairs I realized that the precut panels wouldn't work once I cut the angles. Sigh.... a sheet of plywood wasted? No! My "frugal" side wouldn't let that happen. I decided to just use what I had and make it work. A mere six hours later (yes, six hours!!!) this is what I had:

Six hours later...

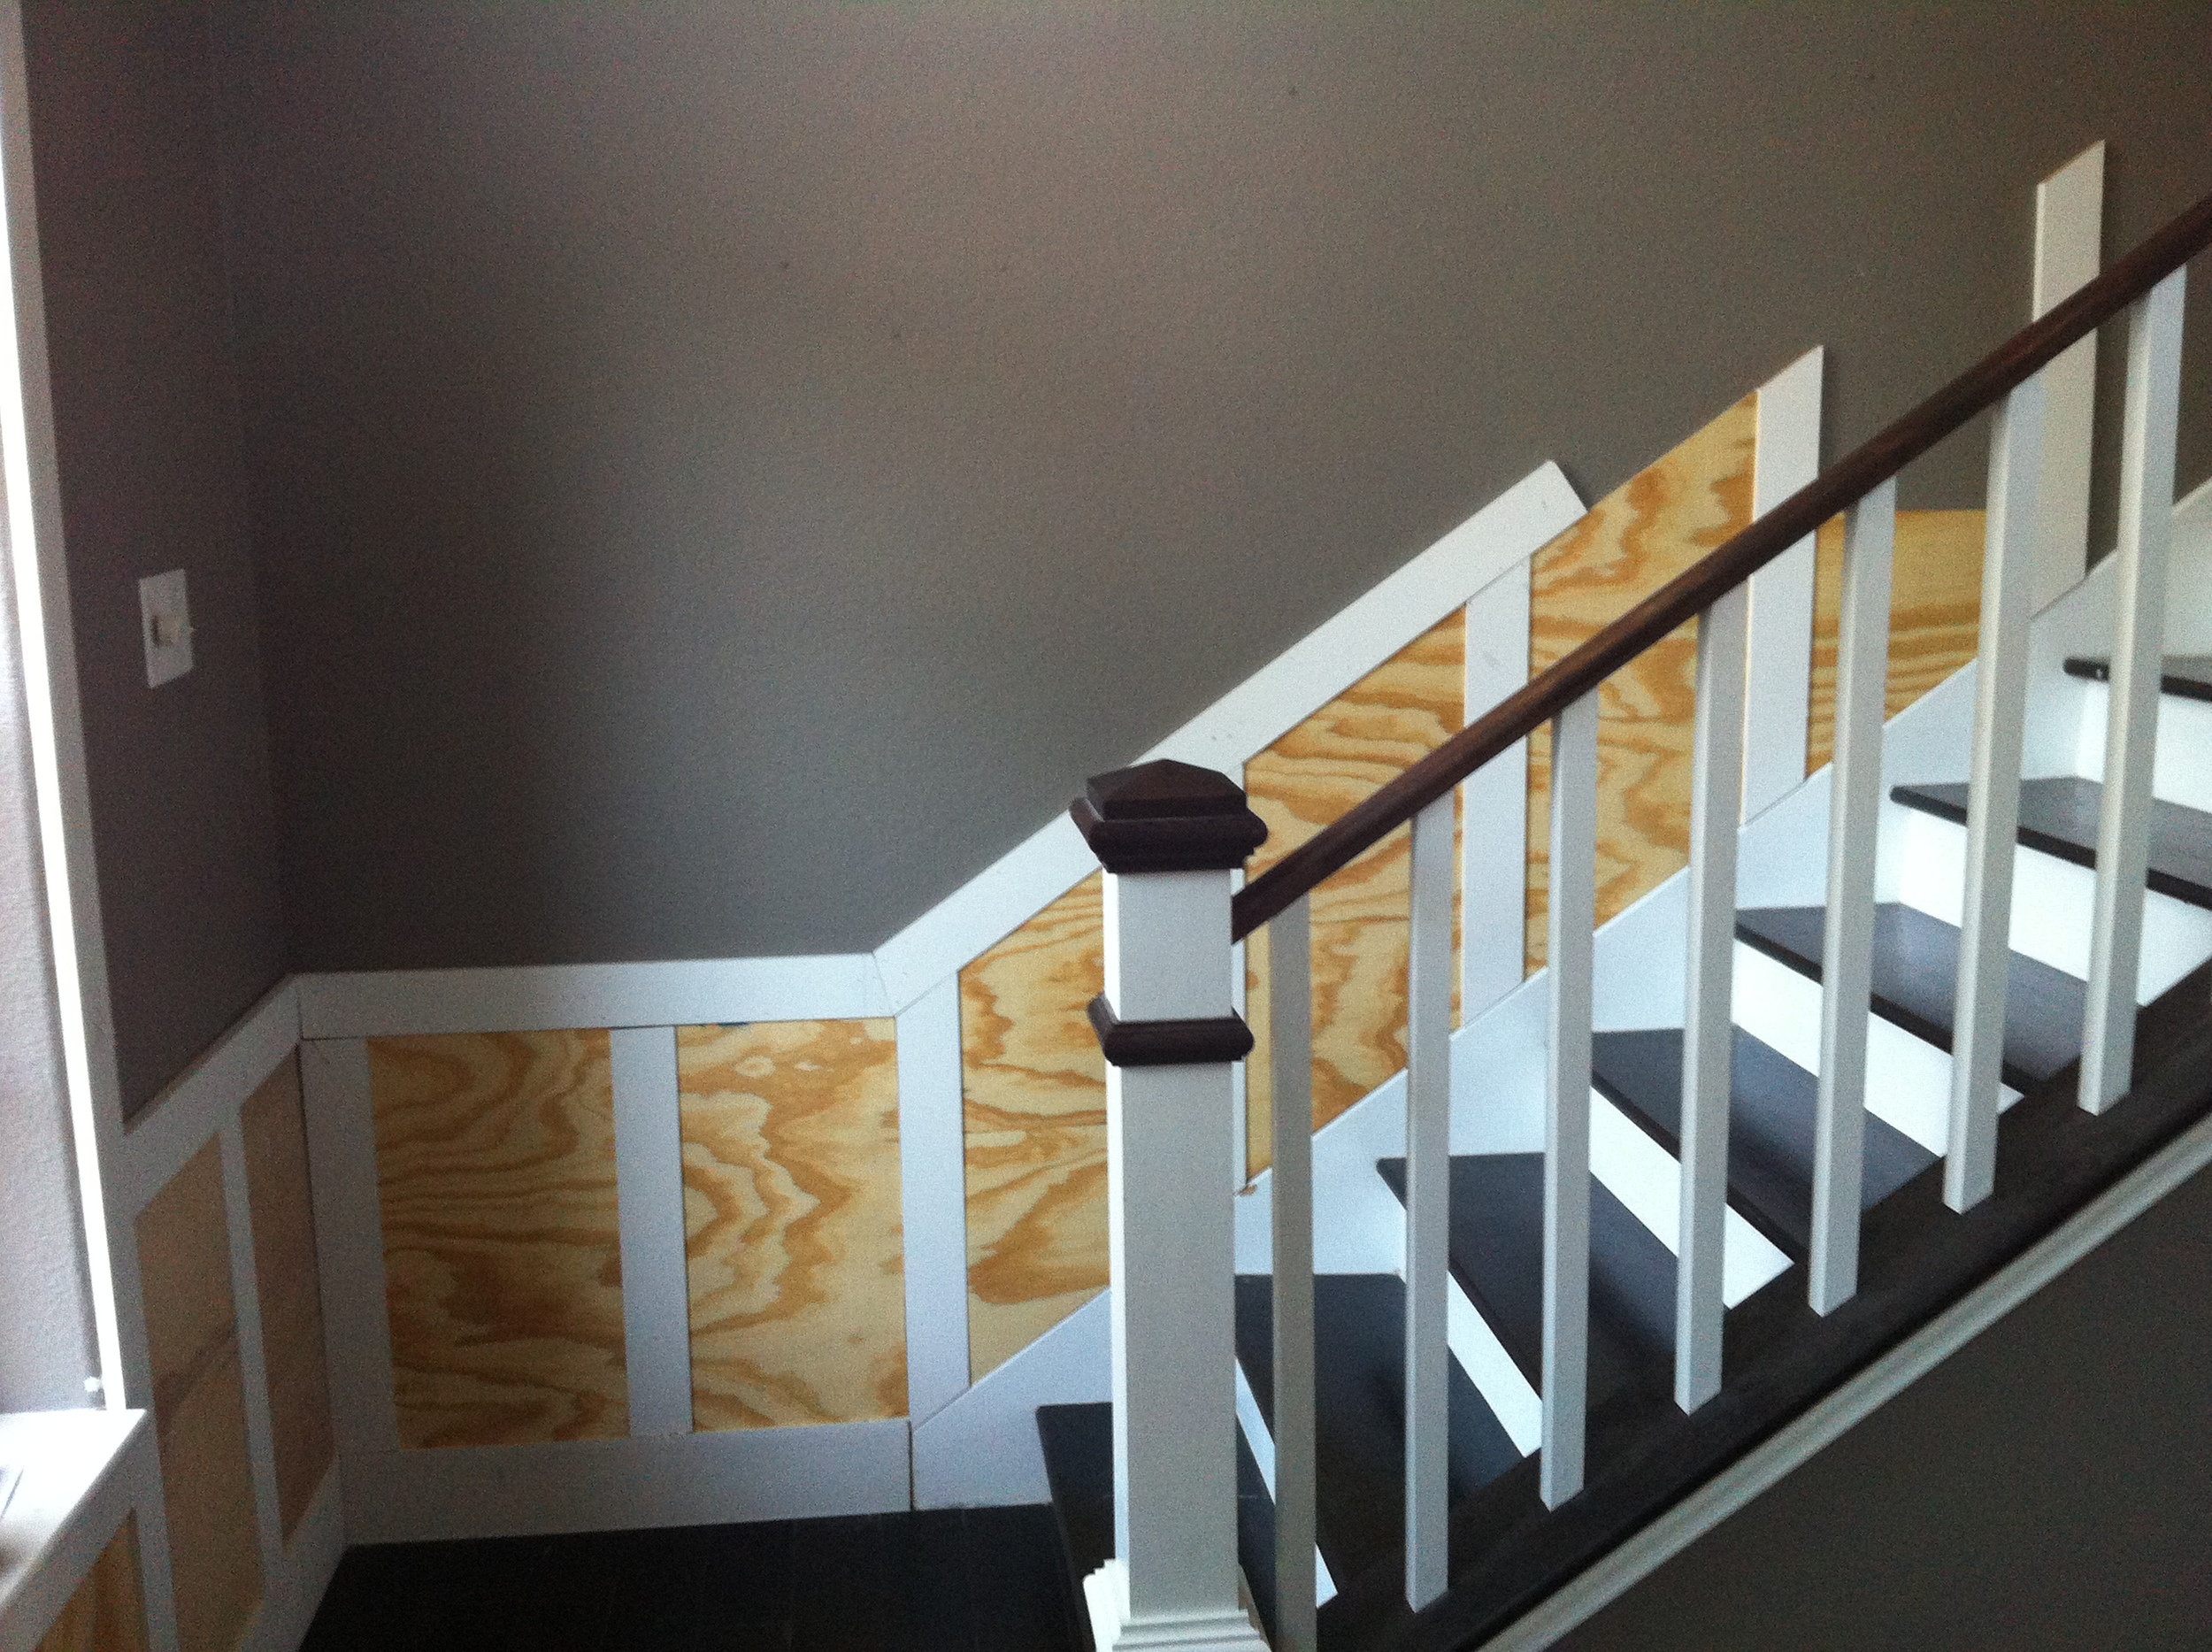
It took so long cutting all of those panels. I finally had to stop working on it because I was making a lot of silly mistakes - the kinds of mistakes you make when you are tired of doing something. Tomorrow I'm going to caulk and prep the wood. The plan is to tackle the rest of it next weekend. I could easily finish it tomorrow, but I ran out of trim (thanks to the silly mistakes) and don't feel like going to Lowe's tomorrow. I figure another week won't hurt anything, right? :-)